You have managed to stumble upon my personal diary page using any photos that I happen to have taken during my travels. Don't expect anything interesting, the page is really just for me! Edit - Even this seems too much to expect!
Thursday, 31 January 2013
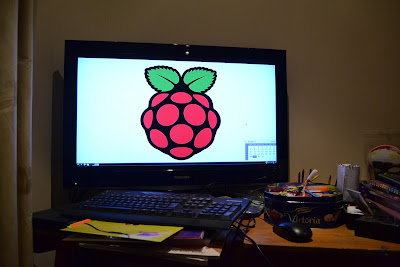
Setting up the Raspberry Pi
Downloaded the latest image tonight, thought I'd list the changes I make to make things easier next time!
1. Install RDP so that I can remote control it.
Info on this from http://www.raspberrypiblog.com/2012/10/how-to-setup-remote-desktop-from.html
basically just run
git clone https://github.com/njh/perl-net-sdp.git
git clone https://github.com/albertz/shairport.git
cd shairport
make
sudo -s
1. Install RDP so that I can remote control it.
Info on this from http://www.raspberrypiblog.com/2012/10/how-to-setup-remote-desktop-from.html
basically just run
sudo apt-get install xrdp
and then use mstsc to connect.
2. Get SSH running.
2. Get SSH running.
I did try to connect remotely using Putty and an SSH connection but it just didn't work. The command
sudo apt-get install ssh
was used to check that SSH was installed (it was) but it didn't seem to be running.
sudo /etc/init.d/ssh start
caused the service to start and
sudo update-rc.d ssh defaults
will make it start each time. I can now connect to the command line from windows.
3.Thought I'd give an actual application a go.
3.Thought I'd give an actual application a go.
I found this post and this one or this one! about using the Raspberry Pi as an airplay receiver so here goes!
The Raspberry Pi is already working so step one is to install the shairport airplay emulator.
The Raspberry Pi is already working so step one is to install the shairport airplay emulator.
sudo apt-get install git libao-dev libssl-dev libcrypt-openssl-rsa-perl libio-socket-inet6-perl libwww-perl avahi-utils libmodule-build-perl
git clone https://github.com/albertz/shairport.git
cd shairport
make
sudo -s
perl -MCPAN -e 'install Net::SDP'
cp shairport.init.sample /etc/init.d/shairport
This will install the required bits and pieces, next this command will make sure that the system is compatible with ios6 git clone https://github.com/njh/perl-net-sdp.git perl-net-sdp cd perl-net-sdp perl Build.PL sudo ./Build sudo ./Build test sudo ./Build install cd ..then we can install the actual application,
git clone https://github.com/hendrikw82/shairport.git cd shairport make
khbdsvb
# Change to our home directory, install all the packages we need.
cd ~
apt-get install build-essential libssl-dev libcrypt-openssl-rsa-perl libao-dev libio-socket-inet6-perl libwww-perl avahi-utils pkg-config git emacs
git clone https://github.com/albertz/shairport.git
cd shairport
make
# Install Net::SDP Perl module
sudo -s
perl -MCPAN -e 'install Net::SDP'
# Demote the onboard soundcard and allow USB soundcards to become default
# Add 'options snd_bcm2835=-2'
# Comment out line 'options snd-usb-audio index=-2'
emacs /etc/modprobe.d/alsa-base.conf
# Copy the example init script
cp shairport.init.sample /etc/init.d/shairport
# Edit the init script to point to Shairport
# NAME=RecordPlayer
# DAEMON="/home/pi/shairport/shairport.pl"
emacs /etc/init.d/shairport
update-rc.d shairport defaults
reboot
Wednesday, 30 January 2013
Tuesday, 29 January 2013
Monday, 21 January 2013
Sunday, 20 January 2013
Saturday, 19 January 2013
Friday, 18 January 2013
Thursday, 17 January 2013
Wednesday, 16 January 2013
Tuesday, 15 January 2013
Monday, 14 January 2013
14th Jan
Sunday, 13 January 2013
Saturday, 12 January 2013
Arduino display and keyboard
Bought an LCD display and keyboard this week, so had a go at hooking them up this afternoon. The display is connected to an I2C bus and also reads the keys pressed on a keypad.
Here is the script that I have used - it is just a quick check that everything works. At the moment I'm not sure what I'll use it for but need to sort out some better cables, mine were a bit cobbled together.
#include <bv4618_I.h>
#include <Wire.h>

BV4618_I di(0x31,9); // 0x62 I2C address (8 bit)

void setup()
{
}

void loop()
{
const char kb[]={0xee,0xde,0xbe,0x7e,0xed,0xdd,0xbd,0x7d,0xeb,0xdb,0xbb,0x7b,0xe7,0xd7,0xb7,0x77};
char tmp;
  // set up display geometry
  di.setdisplay(4,20);
  // set up keyboard scan codes, alter the above constant array
  // this will depend on how the keypad has been wired
  di.setkeycodes(kb);
  // clear screen
  di.cls();
  di.puts("Display Test");
  di.rowcol(2,1);
  di.backlight(1);

  // This requires a wire from the INT pin of the BV4618 to pin
  // D9 on the Ardino. The pin is specified in the constructor
//  while(1) {
//    if(!di.keyint()) {
//      tmp=di.key();
//      if(tmp > 9) tmp+='A'-10;
//      else tmp+='0';
//      di.putch(tmp);
//      di.putch(' ');
//    }
//   }
  // This does not require a wire as it poles keys for a value
  // other then 0. di.keys returns the number of keys in the
  // buffer
  while(1) { // do forever
    if(di.keys()) {
      tmp=di.key();
      // Take the position in the array and convert it into the key that is pressed.
      if(tmp < 3) tmp+=49;
      else if (tmp == 3) tmp+=62;
      else if (tmp < 7) tmp+=48;
      else if (tmp == 7) tmp+=59;
      else if (tmp < 11) tmp+=47;
      else if (tmp == 11) tmp+=56;
      else if (tmp == 12) {
        tmp+=30;
        di.backlight(0);  // Just messing
      }
      else if (tmp == 13) tmp+=35;
      else if (tmp == 14) {    //# Key moves down a line
        tmp+=21;
        di.crdown();
        di.backlight(1);
      }
      else if (tmp == 15) tmp+=53;
      di.putch(tmp);
      di.putch(' ');
      // a delay releases bus - no keys will be lost as the BV4218
      // will capture every keypress for when the cpu comes back
      delay(500);
    }
   }
}
It's really just a variation of the example file provided.
Friday, 11 January 2013
Thursday, 10 January 2013
Wednesday, 9 January 2013
Tuesday, 8 January 2013
Monday, 7 January 2013
Sunday, 6 January 2013
6th Jan
Subscribe to:
Posts (Atom)


